(a) The Forms/E library - the frameworks that your application will be based on
(b) The Forms/E Add-In - the Visual Studio add-in that provides designer support for Forms/E application development.
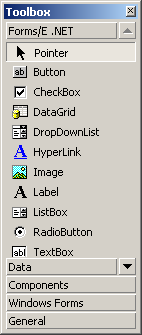
Figure 2: Forms/E toolbox
After installing Forms/E on your system, start Visual Studio. You will see a new set of controls on the Visual Studio toolbox under the tab group "Forms/E".
These are the Forms/E controls you will be using on the Forms/E designer form (See Figure 2) to develop your desktop and web applications. The controls are the familiar Visual Studio controls that .NET developers use to develop Windows Forms desktop applications. The properties, methods and events of these Forms/E controls are the same as that found in Windows Forms controls.
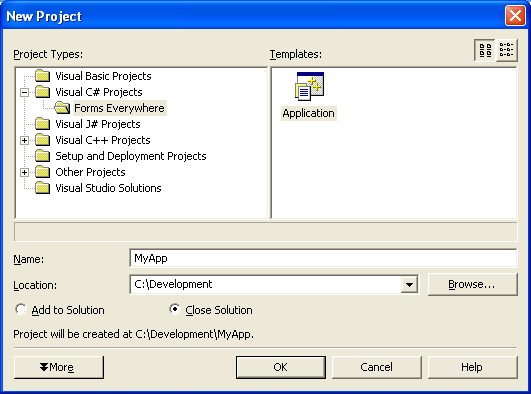
To create a new Forms/E project, select "File - New" project menu or click on the "New Project" on the Visual Studio "Start" page. This will bring up "New project" dialog box (see Figure 3).
In the project dialog box, select "Visual C# > Forms Everywhere" group on the left pane. Enter the name of your application in the "Name" field of the dialog.
On the right pane of the dialog, double click on "Application" icon to create your new Forms/E application. You can also create the new application by selecting the "Application" icon and then clicking on the "OK" button of the dialog.
|
|
|
Figure 3: Project dialog to create a new Forms/E project |
| [1] Currently, Forms/E is in private beta. In order to participate in the beta program, please send us an email at support@capitolsoft.com. |
| Next > Forms/E applications >> |